Showing posts with label Internet. Show all posts
HOW TO CREATE A TORRENT ?
Torrents are great, they are the best way to share large files with your friends, or even with people you don't know at all. But surprisingly enough, not many people create torrents when they need to share something. I have "a lot of" friends who know how to download torrents, but when they need to send me their latest 200MB vacation picture collection, they ask me to "get on msn".
It’s not that I have anything against msn (although the file transfer sucks), but why don’t just use BitTorrent? Especially if you want to send something to more than one person, or if you want to share high quality HDTV files, because then you can share the bandwidth.
So how do you do this? Well it’s very simple. Open your favorite BitTorrent client and do the magic trick:
file > create torrent
That’s all? Well almost. All you need to do now is put in the tracker info and tick some boxes. This can differ somewhat from client to client but it all comes down to the same thing.
uTorrent
1. File > Create new Torrent (or CTRL + N)
2. Select the files and or directories
2. Select the files and or directories
3. Trackers: This is probably the hard part for most people. But it’s pretty easy, just put in one of the popular public trackers. You can use one or more trackers, but in general one is enough.
Here are some good trackers you can use:
http://open.tracker.thepiratebay.org/announce
http://www.torrent-downloads.to:2710/announce
http://denis.stalker.h3q.com:6969/announce
udp://denis.stalker.h3q.com:6969/announce
http://www.sumotracker.com/announce
Put one of these in the tracker box
4. Do NOT tick the private torrent box (unless you’re using a private tracker)
5. Save the torrent and send it to your friends
Bitcomet

1. File > Create Torrent (or CTRL + M)
2. Select the files and or directories
3. Select “enable public DHT network” from the dropdown box
This way you can be your own tracker if the public tracker goes down.
This way you can be your own tracker if the public tracker goes down.
4. Tracker server and DHT node list
Again, This is probably the hard part for most people. But it’s pretty easy, just put in one of the popular public trackers. You can use one or more trackers, but in general one is enough.
Again, This is probably the hard part for most people. But it’s pretty easy, just put in one of the popular public trackers. You can use one or more trackers, but in general one is enough.
Here are some of the most popular trackers at the moment:
http://open.tracker.thepiratebay.org/announce
http://www.torrent-downloads.to:2710/announce
http://denis.stalker.h3q.com:6969/announce
udp://denis.stalker.h3q.com:6969/announce
http://www.sumotracker.com/announce
Put one of these in the tracker box
5. Save the torrent and send it to your friends
Azureus

1. File > New Torrent (or CTRL + N)
2. Tick “use an external tracker”.
And again, This is probably the hard part for most people. But it’s pretty easy, just put in one of the popular public trackers.
And again, This is probably the hard part for most people. But it’s pretty easy, just put in one of the popular public trackers.
Here are some of the most popular trackers at the moment:
http://tracker.prq.to/announce
http://inferno.demonoid.com:3389/announce
http://tracker.bt-chat.com/announce
http://tracker.zerotracker.com:2710/announce
Put one of these in the tracker box
3. Select single file or dicectory, click NEXT and point to the file or directory you want to share, and click NEXT
4. Do NOT tick “private torrent”
5. Do tick “allow decentralized tracking”
6. Save the torrent and send it to your friends
& you are done.....
7 Best Torrent Leeching and Cloud Downloading Sites
Torrents are peer-to-peer. This means that there isn't a main server; rather, people who download also upload. Those who upload are seeders, and those who don't upload are leechers.
Torrents are peer-to-peer. This means that there isn't a main server; rather, people who download also upload. Those who upload are seeders, and those who don't upload are leechers.
Here is a list of 7 best torrent leecher websites to download torrent in a fast way.... · Zbigz.com :- Its good feature is, user can upload torrent and leech that file without register . Zbigz also offer to register free or premium for store your leeched file in click zbigz accounts. and download that leeched file any time anywhere from your account with Idm and dap and other download manager.
· Quick-Torrent.com:- This is an online software that downloads torrents that a user wants and then provides them with a direct download link for the file. It also ensures that data downloaded from Quick Torrent is encrypted and your ISP doesn’t find out that you’re downloading torrents.
· PCloud.com :- This website gives you 10 GB of free space, which you can extend to 20 GB by inviting your friends to join. It also has apps for both Android and iOS patforms.

· Btcloud.io :- This is a cloud storage that has been integrated with the global BitTorrent network. It allows you to join big communities of users online. The download speed that you get here will depend on the account that you have chosen. 
· Boxopus.com :- This website downloads torrents without any software and stores it in a cloud. The user needs to provide the torrent files, magnet links or torrent page URL and they can download the torrents anonymously using an encrypted channel. You can also listen to or watch your torrents from a private page.
· Filestream.me :- A free membership on this website provides you with 1 TB of disk space. You can get a number of other options through the premium accounts. 
Here is a list of 7 best torrent leecher websites to download torrent in a fast way....
· Zbigz.com :- Its good feature is, user can upload torrent and leech that file without register . Zbigz also offer to register free or premium for store your leeched file in click zbigz accounts. and download that leeched file any time anywhere from your account with Idm and dap and other download manager.
· Quick-Torrent.com:- This is an online software that downloads torrents that a user wants and then provides them with a direct download link for the file. It also ensures that data downloaded from Quick Torrent is encrypted and your ISP doesn’t find out that you’re downloading torrents.
· PCloud.com :- This website gives you 10 GB of free space, which you can extend to 20 GB by inviting your friends to join. It also has apps for both Android and iOS patforms.
· Btcloud.io :- This is a cloud storage that has been integrated with the global BitTorrent network. It allows you to join big communities of users online. The download speed that you get here will depend on the account that you have chosen.
· Boxopus.com :- This website downloads torrents without any software and stores it in a cloud. The user needs to provide the torrent files, magnet links or torrent page URL and they can download the torrents anonymously using an encrypted channel. You can also listen to or watch your torrents from a private page.
· Filestream.me :- A free membership on this website provides you with 1 TB of disk space. You can get a number of other options through the premium accounts.
Tag :
Internet,
Tips n Tricks,
What is Torrent Leeching & Seeding ?
This is a brief description of SEEDING to help explain how important it is in the bit-torrent world.
I will base this example on a newly uploaded 1.5MB file with one original seed.
SEEDING:
YOU download the file to your bit-torrent client at a speed of 20kbs. While it is downloading you are 'Leeching.' It takes only a minute or two and once it has downloaded you have the whole file. What do you do now?
Nothing, not if you haven't blocked/limited uploads within your client properties.
The file will stay where where it is and simply be 'available' for others to connect to, it is therefore a 'SEED.' In the most serious sense of the word, it is only actually a seed once you've uploaded the full file at least once. But we'll ignore that for now.
Your upload speed on this file is 20kbs, that means a third person who downloads the file can obtain, in theory, 40kbs download speed. So with your seed added the download speed available on the torrent file has doubled! As more and more people download and seed the file, the speeds can reach extremely fast pace.
Of course, speeds will vary, depending on how many seeds available, how many leechers, how many peers are connected and a bunch of other variables, but that is the condensed theory.
LEECHING:
Leeching is, as mentioned above, the process of connecting to the download and obtaining the file. It is called leeching because you have not as yet created a seed. You may read various posts relating to the word' leechers' as some form of demonic presence, but in truth we are all leechers at some stage in torrent share. What gives Leeching a bad name is the fact that many people do not return the favor once they download. In short they 'leech' the file from others and fail to upload the whole file in return. Some people even restrict their bandwidth to minimal or even NO upload speed, and of course this affects speeds and availability of the file.
However, you need to understand, especially when using our example, that leeching is as important in the initial stages of sharing a file as Seeding will later become. Without leechers there can be no seeds. So on a newly added torrent, you may often see many leechers compared to the number of SEEDS.
For your own guidance, you should check the properties and options of your particular bit-torrent client. If you want to help the torrent world by seeding more advantageously, do not restrict your upload speeds and/or bandwidth. However, you may need to manipulate these properties on a individual file bases if you have limited bandwidth.
Online Free MP3 Cutter - Cut your audio files quick and easily

The web application is free; it was designed for a single purpose, which makes it easy to use unlike complicated professional audio editors:


Detailed instructions on how to cut a song.
- Just open the file (audio or video)
- Adjust the interval and click "Cut"
- Save the track on your computer’s hard drive
Detailed instructions on how to cut a song.
Cut MP3 Instantly
Once you open an MP3 file, you can cut it immediately. This makes it possible to use the application even having a slow Internet connection.Create Your Own iPhone Ringtones.You can save the fragment you cut in M4R format which is supported by iPhone as a ringtone. More on how to create a ringtone for your iPhone?
Cut Sound from a Video File
If you upload a video file, the cutter will extract the audio track from it. More on how to extract the sound from a video?Fade-In and Fade-Out functions
This function can be useful when creating ringtones for your mobile phone. The sound will start from silence and gradually become louder within a few seconds. Read more on tips for cutting music.Support of All Major Audio and Video Formats.

It supports more than 150 audio and video formats including the most rare ones. You can cut files in MP3, WAV, WMA, OGG, M4A, etc. See the full list of supported formats.
Directly Open or Save Your Files To Google Drive/ Dropbox

You can also try these free online apps

Download Here Offline Software to Convert or Merge Your Media Files:- Format Factory

Tag :
Internet,
Tips n Tricks,
10 Ways to Share Big Files With Little Hassle

E-mail and IM suffice for small file transfers like Office documents or photos, but for anything more substantial (e.g., high def videos of your cat jumping into boxes) you're going to need to look somewhere else. Even our beloved Gmail chokes on anything over 25 MB, and refuses to transfer certain files like executables (.exe). Geekier types might set up an FTP server or create a torrent, but those methods can be a hassle for quick deliveries. There are, however, various P2P (peer-to-peer) and Web-based solutions that allow you to quickly and easily share files, often with just a few clicks. Read on for our favorite ways to pass around bulky bits that e-mail just can't handle.
Dropbox
 Our favorite file-syncing service is also a great way to share big files or collections. Adding an item to your public folder allows anyone to grab it, but you can right-click and get a shareable link for any file or folder you've stored in Dropbox. This works not just from the website, but also from the context menu in your file browser. You can even selectively share files or folders with people and allow them to add or modify files, as well -- as long as they also have Dropbox. The service puts no limits on the file's size, so long as you have the available storage. Theoretically, you can share up to 2GB for free.
 Best for: Collaborating and sharing several files over a long period of time.
RapidShare

Best for: Sharing large archives with several people who have degrees in math.
MegaUpload
 Similar to RapidShare, MegaUpload is a simple place to dump files online so others can download them. You can upload 500MB of files without even signing up for an account, and each file will be stored until it has gone over 21 days without being downloaded. By registering with the site, you lengthen that period to 90 days. Registering with the site also ups your limit to 2GB, but be aware that non-premium members can only download 1GB at a time. Premium users, who cough up $9.99 per month, lose all restrictions on the number of downloads, file size and their length of storage. For non-premium members, daily caps are placed on the bandwidth.
 Best for: Sharing albums and videos with members of your favorite forum.

DuShare
DuShare is a slick-looking, if slightly confusing, P2P file-sharing site. Unlike previous entries on this list, the site doesn't ask you to upload a file that other users can then download. Instead, it generates a link that, when clicked, connects the other person directly to your PC to download the file. DuShare offers a few welcome features, including the ability to chat while downloading and password protection. Plus, you must keep the site open until the file is finished transferring.Best for: Sharing things you'd rather not upload to some shady-looking website.
FileDropper

FileDropper is impressive in its simplicity; upload a file up to 5GB in size, get a link, and then send it to a friend. There are no other restrictions, and registration isn't required. Signing up for one of the premium plans (starting at a measly $0.99 a month) adds direct linking for images, bumps up the file size (to a whopping 250GB on a $10-a-month plan), and allows you to track what you upload. All of this with no spam, no wait times and no advertisements. The downside? FileDropper has some serious issues with stability and speed. The site often failed to load, and transfers varied in rate from abysmal to surprisingly fast.
Best for: Sharing movies and discographies with patient people.

MediaFire
This full-featured, file-sharing service limits file sizes to 200MB on free accounts, but a $10 monthly fee ups that limit to 2GB. However, a free account still entitles you to unlimited uploads, downloads, and storage. MediaFire can handle multiple uploads at once, lets you share entire folders, protect files with passwords, and view images in gallery view. It even has rudimentary integration with Facebook, Twitter and other social services. Perhaps most intriguing is the "dropbox," which lets you embed a widget in a website that then allows others to upload files to your MediaFire account.Best for: Chronic sharers and collectors.

WikiSend
If your file-sending needs are a little more modest (but still outside of the realm of an e-mail attachment), WikiSend offers a simple solution. Upload a file, give it a name, decide how long it will be available (one day to 90 days), and choose whether or not to password-protect the download. Uploads are limited to 100MB, and signing up for an account nets you no new features or advantages. But it does its thing quickly, easily and reliably. Best for: Quick and dirty sharing of mid-sized files.
 Senduit
Similar to WikiSend, if a little prettier, Senduit provides only 100MB for each file, and offers only the most basic of options. But Senduit does present a more fine-grained control of a file's lifespan. Possibilities top out at one week, but, if you want to restrict access, you can make files available for only 30 minutes to an hour.SenduitBest for: Limited time engagements.

YouSendIt
YouSendIt seems to be many companies' preferred method of sharing large files. Free users can only upload files less than 100MB in size, and the files are deleted once they've been downloaded 100 times. Free users don't get any permanent online storage. With a Pro or Pro Plus account, users can share files up to 2GB in size, send multiple files and folders to recipients, select how long a download is available, track downloads and benefit from DropBox integration. A Pro account runs $9.99 a month. Yet for $14.99 a month, a Pro Plus account offers more advanced tracking and security features, and increases the total storage from 2GB to 6GB.Best for: Businesses that can afford the premium features.
 WeTransfer
Certainly the most stylized of the file-sharing sites,WeTransfer has that bubbly Web 2.0 vibe about it that you either love or hate. You can upload as many files as you want, provided they amount to less than 2GB, and share them with up to 20 people via an e-mailed link. Files are available for 14 days. WeTransfer doesn't offer any other advanced features, but the background does rotate nicely through a series of (sometimes painfully self-conscious) images in order to keep you entertained while your files upload.A quick comparision is here...


Tag :
Internet,
Tips n Tricks,
How to download Facebook videos to your computer online- Step by step
1. Play your Facebook video and copy the link from the browser.
Download facebook video step 1
2. Now go to downvids.net paste your link in the given space, select video quality & format and then Press “Download” or Right click.
Check the box “Download in HD Quality” if you want to download video in highest possible quality.

How to download facebook video step 2
3. Your file will start downloading. Give it some time to download, which depends upon the file size.
Tips
If you want to download multiple videos, refresh your downvid.net’s page after you download one video.
Share this tutorial with your family and friends. Ask anything in comment.
You just learned about How to download Facebook video to your computer online.
For more valuable stuff, visit HackTechTips.
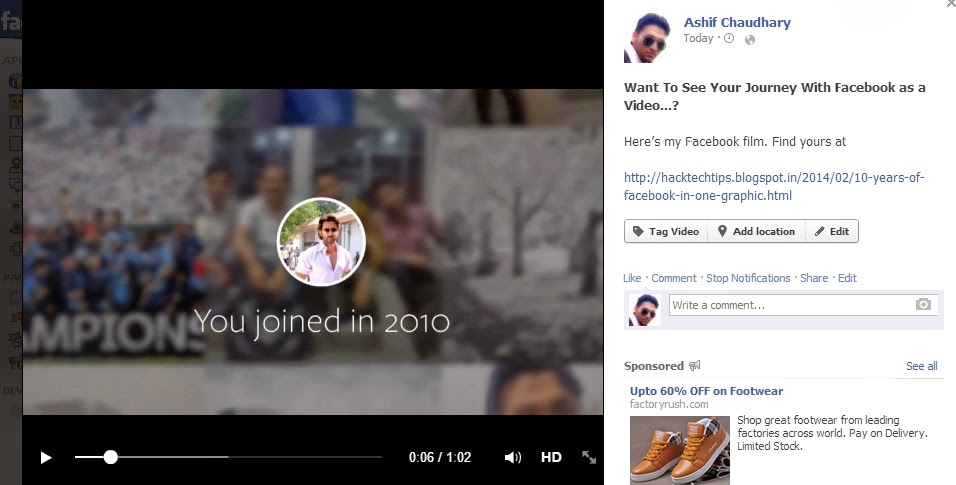
You may also like this See Your Facebook Journey as A video in Just 62 seconds..
10 years of Facebook in one graphic.....
If you're on Facebook, a new video about your life went live online Tuesday (04 Feb 2014).
Yes, you. And you, and you and you.
With the help of an automated tool, Facebook has created short, personalized video highlights for "hundreds of millions" of its users. The 62-second clip notes the year you joined Facebook, then shows a handful of your most-liked posts and a seemingly random selection of your photos -- all set to instrumental music.
To see yours, go to Facebook/lookback and admire, or cringe.
Facebook celebrates 10 years
Facebook posted the clips, titled "A Look Back," without fanfare Tuesday to commemorate the 10th anniversary of the social network, which was founded by Mark Zuckerberg and four classmates at Harvard University on February 4, 2004.
"People often ask if I always knew that Facebook would become what it is today. No way," wrote Zuckerberg, the company's CEO, in a Facebook post Tuesday.
"I remember getting pizza with my friends one night in college shortly after opening Facebook. I told them I was excited to help connect our school community, but one day someone needed to connect the whole world."
You may also like this : How To Download Facebook Videos To Your Computer Step By Step


